Build this simple patio using stone pavers for your backyard or garden
In today’s post I want to show you how we created a paver stone patio in our backyard. We did it by using a few tools, a lot of sand, and some stepping stone pavers from our local home and garden store. Check out the process below!
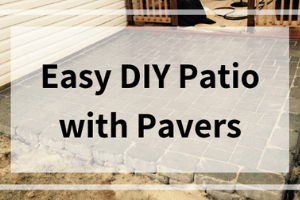
After we built our deck, we wanted to extend the outdoor area a bit more with a DIY patio using pavers. This is partly because we wanted to have a place to put the grill without taking up space on the deck, but also partly because my husband is still on a mission to cover as much of our backyard grass as possible. He really hates mowing, and I’m pretty convinced at this point if he could turn our entire backyard into a zen garden of sand he would.
Before jumping in to this project take a look at what HGTV says you should focus on to build the best patio for your space. There you’ll find some design inspiration and patio planning advice to help you through the process.
Our space originally looked like this:
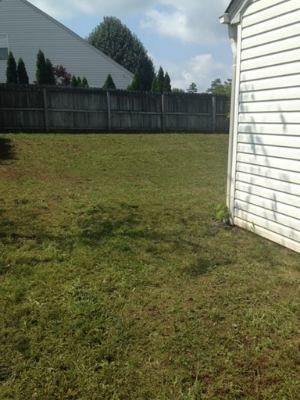
So we started planning how we wanted things to go down, measuring out the space. We decided building the patio out to be even with the back of the house would look best. This meant the patio space would cover about a 10′ x 10′ area.
We chose to use stone patio pavers, as these would be much easier to lay than pouring concrete. We are DIY enthusiasts, not professionals remember!
*Some links in this article are affiliate links, which means I may get paid if you buy something or take an action after clicking one of these.*
Things needed for this project:
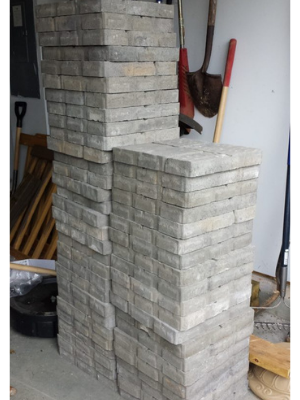
- Pavers (Similar to THESE 12″ x 12″ we found at Lowe’s)
- Border Pavers 4″ x 8″ also at Lowe’s (optional)
- Rubber Mallet
- Shovel
- Paver Sand aka Polymeric Sand for the top layer (to fill in the cracks between the pavers)
- Regular play sand (for leveling out underneath the pavers because it’s cheaper than using paver sand for everything)
- A level
The Work Begins: Creating a Paver Patio Area
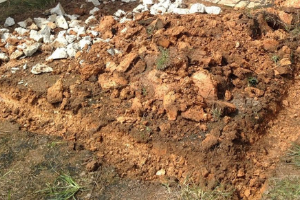
We began by digging out a space in the ground to lay a border of smaller pavers, creating a sort of “tray”. That way we could pour sand into the tray, level it all out, and set the large pavers into that.
Home Renovation and DIY Project Related Articles
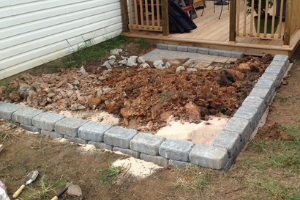
Next it was time to pour the sand and lay the border! You can see near the top of this next picture we had laid some pavers by the deck before starting to put down the border, but we decided they were going to be too low. So we pulled those up after this picture was taken and built up the ground a little more with dirt and sand before putting them back down again.
So much sand…
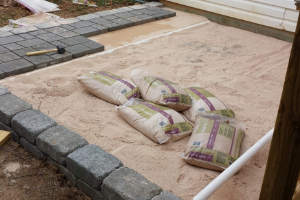
Those white 2″ PVC pipes were laid in the sand to act as a guide to help us keep the sand mostly level and then were removed before setting down the pavers. We also used a dirt tamper to help flatten the sand by hand.
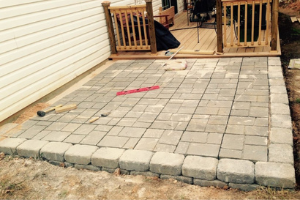
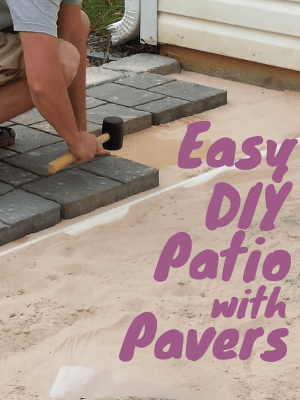
The pavers were all added and leveled into place with the help of a rubber mallet. Then we filled in the cracks with: you guessed it, more sand. BUT this time it was that special kind, that hardens when you add a little water to it. You can find a similar product to what we used like this one below on Amazon.
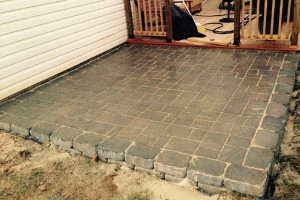
The Easy DIY Patio with Pavers
And it’s done! This was a fun and simple project to tackle. Also the extra space has been really great in keeping some things from taking up room on the deck. These patio pavers were not complicated to install and not a bad option if you’re on a budget either.
Do you have any summer patio plans of upgrading your backyard? I’d love to hear about them in the comments! Could also use a few ideas on decorating this space too so if you have any, send them my way!

This turned out really well. I love the idea of doing the work yourself, especially projects like this. It makes you appreciate the end result even more.
Thank you! We were pretty happy with the results. And definitely, hauling all of the pavers around will really make one appreciative! 😀
Hi! This looks awesome and totally like something we could do! I was also thinking of doing a 10×10. may I ask where you got your sand from and about how many bags you needed?
Thank you! Yes this is definitely doable! I believe we got our sand from Lowe’s, and we used about 35 bags in order to cover the 10×10 with a 2 inch depth. Thanks for stopping by and let me know how it goes if you try it!
How many inches of sand did you use? We are about to diy a patio with sand and pavers.
Did you have to level your ground or was it pretty level to begin with?
Hi Miranda! We didn’t do any leveling beforehand because it was pretty level already, but we did have to dig down to make a sort of “tray” out of the dirt. Then we poured the sand into that. Thanks for stopping by!
The patio looks great! I’m trying to decide on what type of pavers to use and the cheapest as my patio area is almost twice the size. Where did you get your pavers?
Hi Theresa, thanks! We found ours at our local Lowe’s Home Improvement. They were similar to the ones here: https://www.lowes.com/pd/Square-Gray-Concrete-Patio-Stone-Common-12-in-x-12-in-Actual-11-7-in-x-11-7-in/3018983 thanks for stopping by!
Hi, what type of self hardening sand did you use to seal in the pavers? Love how doable you make it look!
Hi Rachel! The sand product goes by a few different names, like “jointing sand” or “polymeric sand” and it’s pretty common to find it at Home Depot or Lowe’s. We used something similar to this: https://www.lowes.com/pd/0-5-cu-ft-Brown-Jointing-Sand/50396328 which should harden when water is added while also filling in the cracks between the pavers. This is for sure a great project for beginner DIYers, as long as you don’t mind some manual labor! Thanks for visiting!
H! Did you all need to rent the machine for compacting the pavers while doing the sand hardening? Or you think you could pass on renting it?
Hey Laura! For this project we did not rent a compacting machine. Instead we just used a dirt tamper like this: https://www.lowes.com/pd/Kobalt-8-in-x-8-in-Tampers/1000377393 to help press down and flatten the sand by hand. Since it wasn’t too large of an area and isn’t meant to support high traffic or heavy weight we decided to forgo renting the machine. Thanks for reading!
Most patio instructions require a gravel base before the sand. Is there a reason you didn’t use or didn’t need gravel first?
Hi Valerie! It’s true that gravel is often recommended to help provide a more solid foundation under the sand for the pavers, especially if the ground regularly freezes in the winter or if you have poor drainage in the area. We didn’t include a gravel base for our project because those conditions didn’t apply here. Since every location is different, you’ll want to take into account the stability of the soil before laying pavers to help you decide if the gravel is necessary. Thanks for reading!
I was curious did you use leveling sand and base sand? I. Saw at the store they had both. Also have you heard anything about the black plastic looking things that are supposed to replace the base sand? Thanks
Hey Valerie! We used just a basic leveling sand under the pavers first, similar to this – https://www.lowes.com/pd/Paver-Leveling-Sand-0-5-cu-ftNatural-sand-Leveling-paver-sand/1001364414 and then we put down the special paver sand between the cracks of the pavers so that it would harden once we added some water. This kind of sand goes by a few different names, like “jointing sand” or “polymeric sand” and it’s pretty common to find it at Home Depot or Lowe’s. We used something similar to this: https://www.lowes.com/pd/0-5-cu-ft-Brown-Jointing-Sand/50396328 Thanks for stopping by!
Just picked up 1800 pavers for free. I have a 18X20 wood ground level deck to replace. Thanks for the ideas with the 10 X 10. How to I keep and 18 X 20 level with right slope .
Hey Ken! That sounds like a lucky deal, way to go! For the leveling, as we were putting down the sand we used a 2″ PVC pipe to act as a guide in keeping the depth of the sand consistent. If you also decide to use a pipe as a guide, you should make sure it’s as leveled or sloped as you desire. Thanks for reading!
This looks great. Approximately how much did you spend on this project altogether? Did you have to buy any tools you didn’t already have?
Hi Mariel! This project cost us around $600 in total. It will vary of course due to your choice in materials. As far as tools, we did have to buy a dirt tamper like this one: https://www.lowes.com/pd/Kobalt-8-in-x-8-in-Tampers/1000377393 Thanks for stopping by!
Hello, for Beautiful ideal and I definitely wanted to try something out like this for my backyard. If you don’t mind me asking you how many patio pavers did you use and how much was the cost of total project
Hi and thank you! We used about 45 large pavers in the middle of this patio that were 12″ x 12″ each. Then we made a border of two layers of about 80 smaller stones, with each of those being about 6″ x 9″. Altogether the total cost of the project was around $600. Thanks for reading!
I’m wanting to do the same project with a low budget. What is the average cost to do this project?
Hi Christy! I hate to say it depends, but it really does! For the size of this one and the materials we used, it cost us around $600. I can’t say for sure if that is the average cost but for us that included some middle-priced stones, the sand, and few small hand tools. If you decide to do a project like this let me know how it goes and good luck!
Could you give a ballpark estimate of your cost?
Hi Louise! This project cost us around $600 altogether. Thanks for reading!
Love the look. Definitely going to try to do this myself. How many pavers did you use?
Thanks Lilly! We used about 80 of the smaller 4″ x 8″ pavers around the boarder, and 50 of the larger 12″ x 12″ pavers. Thanks for reading!
What an amazing job! I am inspired. Just a few questions…the broken concrete and dirt we see in the first picture with the border, did you take it all out or did you just level it and pour sand over it? Usually under pavers you use gravel or crushed stone under the sand, did you not have to do that? And after laying the sand, did you use a compactor (machine) to set the sand before putting pavers on top? We are going to be doing this in a few weeks. Thanks!
Hi Ann, thanks for your questions! We ended up taking the broken concrete and some of the extra dirt away – just after I took the picture (of course haha). That gave us more of a “bed” to pour in the sand and then level that. We didn’t put any gravel under the sand (to help prevent the pavers from sinking), since the ground in this area is pretty solid already, doesn’t usually freeze, and won’t be a high traffic space supporting heavy loads or anything. Also we used a dirt tamper tool like this one: https://www.lowes.com/pd/Kobalt-8-in-x-8-in-Tampers/1000377393 Thanks for stopping by and best of luck for your project!
Hi Thinking of doing a similar project but trying to estimate cost. Can you break down the cost of your project please? Thank You. it looks amazing.
Hi Tracy! Thanks for stopping by, this project cost us about $600 in total. $200 of that was for the 50 larger stones (12″ x 12″), another $150 for the 80 smaller stones (6″ x 9″), about $50 in hand tools (dirt tamper, rubber mallet, pvc pipe), $150 for the paver sand, and the rest was in taxes. Let me know how it goes for you if you decide to do something similar! – Caitlin
Did you place a weed barrier down? Are weeds not an issue?
Hi, this is exactly what I am thinking of doing in our backyard but in a larger scale. I’m curious and because I really am not even close to a pro, do you have to lay sand down before you lay the pavers?
How is the sand that you used to seal your work different from stone dust? I like what you did but with a bad knee, I’ll probably have to get someone to help me. I wanted to do something similar but using bluestone for lower layer and build small wall with castle stone. Thanks for the inspiration!