How to make your own wooden decorative bohemian chic or Scandinavian inspired shelves
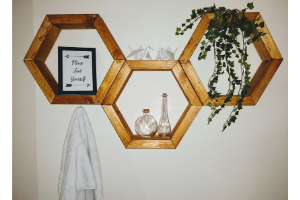
I’m sure you’ve seen these beautiful pictures on Instagram and Pinterest. You know the ones. Depicting a dream life of cozy bohemian style blended with that clean Nordic influence, these aesthetic images are GOALS. Well for me at least.
But looking at the price tag of the items in these photos I’m reminded that I’m way too cheap to ever achieve a room full of decorations like that. So what’s a frugal girl to do? DIY of course! That’s why today I’m going to show you how I took a staple of this style of decor: the hexagon or honeycomb shelves, and DIY ‘ed my own.
*Some links in this article are affiliate links, which means I may get paid if you buy something or take an action after clicking one of these.*
How to Build Your Own Honeycomb Shelves
Things You Will Need for this Woodworking Project:
- 2×4 Wooden boards, 8ft long (2x) – About $4 each at Lowe’s.
- If you don’t have a Miter saw, consider renting from a hardware store like Lowes for about $25. If you don’t do these projects often, this is a much more affordable option.
- I used the Velcro strips because I didn’t want to put holes in the wall, but regular nails would also work.
- If you don’t have ratchet straps you could also use rope.
- Gloves, paper towels (or a rag) and a table for the saw are also nice to have but not necessary.
Total Project Cost: ~$50
Hexagon Shelves Measurements
The first part, and most important as always, is getting the measurements right. I needed to start by cutting the 2x4s down into more manageable blocks. I knew I wanted each side to be 8″ at the longest point, so I marked each block to be a little longer than that.
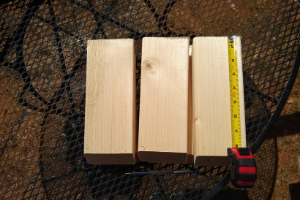
Cut Blocks for the Honeycomb Shelves
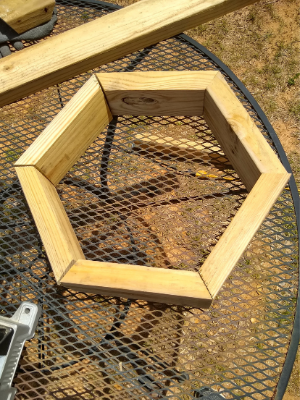
I set the Miter saw to a 30° angle. According to geometry, this is what you’ll need each angle to be exactly for the hexagon pieces to fit together. After carefully checking to make sure the blade would line up where I wanted, it was ready to go! I wanted to make 3 shelves total, with each side of the 18 blocks needing to be sliced.
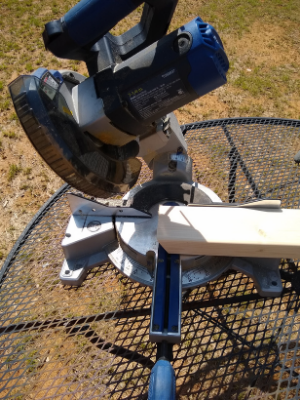
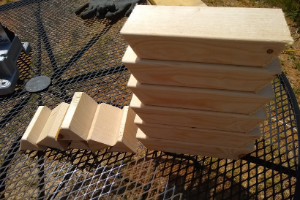
36 cuts later, and it was so hot! Whew!
Other DIY Projects You May Enjoy:
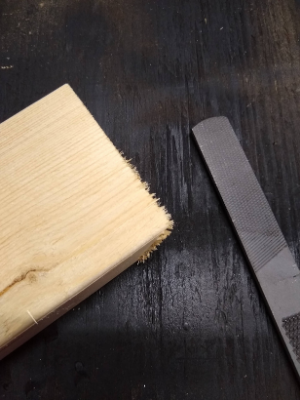
Next it was time to head into the garage and file off some of these edges. You could use sandpaper, or scissors for this part, or you may not need to do this at all but I had some splinters that I wanted to smooth out.
Glue the Hexagon Shelves
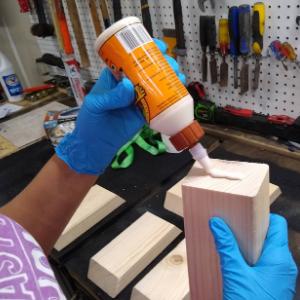
Next it was time to apply the wood glue, spread it out and press all of the blocks together. I then held them in place with a ratchet strap, but if you don’t have those you could accomplish the same with rope.
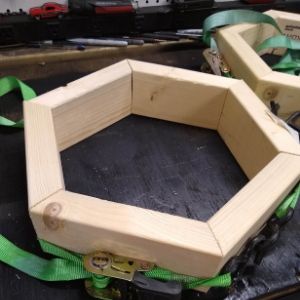
I let these dry and harden overnight, then came back the next day to remove the straps. They were pretty sturdy, but if you wanted to add some screws here to reinforce the joints you could.
Stain the Hexagon Shelves
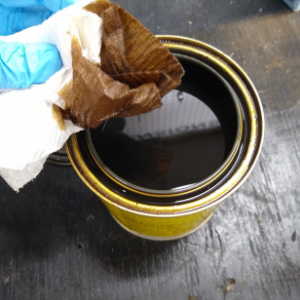
This stain pictured above is very watery, and it’s easy to apply with a cloth or paper towel. A little goes a long way. The goal was just to cover all of the surfaces with the stain as evenly as possible.
To do this I basically just dipped a small part of the bunched up paper towel then smoothed the stain over the wood to the top, inside, and outside surfaces first, let that dry for a few hours, then flipped it over and did the other side. I liked how that looked after one application so that’s where I stopped.
Hang the Hexagons
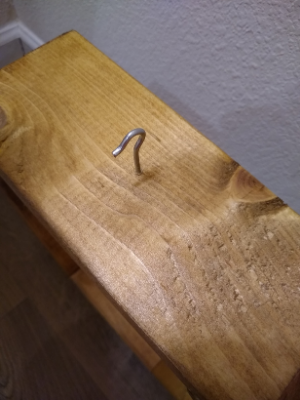
I wanted a small hook on the bottom of one of the hexagons because I planned to hang a hand towel there, so I just added that by hand since the wood was soft enough.
Next I added the 3M strips, and placed it where I wanted it on the wall, pressing for 30 seconds per the directions. Since they said to remove the weight for an hour after initially sticking them to the wall, I detached the shelves and left the one half of the velcro on the wall to “bond”.
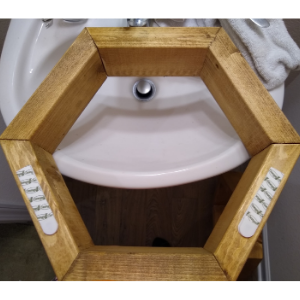
Here’s where I hit a small snag. While I was waiting out the hour, I noticed the half of the velcro that was supposed to be sticking to the wood was separating and not sticking. For some reason it just wasn’t bonding, maybe because of the stain.
So, putting my ingenuity to work I decided to try super gluing the strips the wood to see if that worked. Have I mentioned that I’m not a professional?
Well the superglue didn’t work either, and at this point I seriously reconsidered my desire to avoid holes in the wall. As a last ditch effort I got some fabric Velcro strips and used a staple gun to attach them to the wood.
While I could have stapled the original 3M strips, they are made of a foam substance that I didn’t think would be as strong as the fabric. So with that Frankenstein-like workaround, I pressed the shelves back onto the other half of the strips on the wall and it worked!
I left them up for a few days with a table close under them and no additional weight to see if they would hold and they made it. If nothing else, let all of this serve as a cautionary tale of something you can avoid if you just use nails. You’re welcome.
How to Decorate Hexagon Shelves

Due to reasons previously mentioned above, I wanted to keep the decor as lightweight as I could. I found a 4×6 photo frame on sale for $3 at Michael’s, along with this small ivy bunch for $7.
I made the sign with Canva for free and printed it out. The alchemy bottles are also from Michael’s. They are small and were just $2 each. I made the paper cranes. Overall, the decor was less than $15.
Final Reveal: Hexagon Shelving DIY
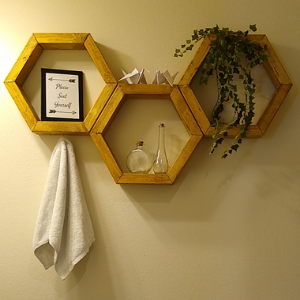
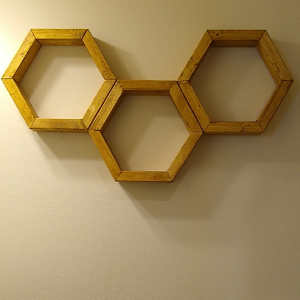
And here’s the finished project! Total cost of materials and decor was $65, and it probably took about 6 hours spread out over multiple days.
Ahh, now I’m one step closer to living my best Instagram life. 🙂 I hope if you give this a try you’ll let me know how it goes for you in the comments below. Happy DIYing!
Other Articles Related to Frugal Living:
- Frugal Face Care Routine
- Everyday Product Swaps that are more Eco-Friendly
- Save Money with Travel Hacking

Leave a Reply