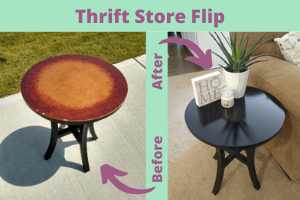
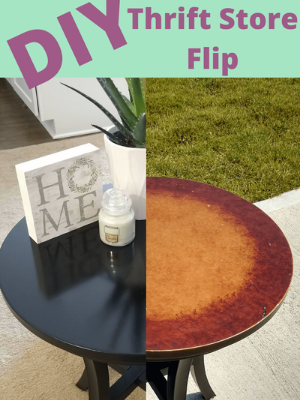
DIY transformation of an end table from a flea market
If you’re here reading this, you probably already know the absolute gold mine that is a thrift store. You’re also probably very familiar with the feeling of excited anticipation you get while walking through these thrift stores searching for your next furniture flip.
Once you find that diamond in the rough, all you need is a little time and effort to experience the true satisfaction that is restoring something to it’s former glory. Or better yet, to an upcycled nirvana, surpassing what it once was.
Even if you don’t like experiencing this little scenario I’ve presented above in real life, I bet you can’t deny the secondhand joy of seeing the before and after of a good project completed. So stick around and maybe you’ll find yourself looking for your own thrift store flip to tackle soon.
*Some links in this article are affiliate links, which means I may get paid (from the affiliate, not you!) if you buy something or take an action after clicking one of these.*
A Side Table – The Perfect Thrift Store Flip
The humble end table. It’s versatile, simple, and so common that it’s easily the best piece of furniture to begin your thrift store flipping journey. You want to look for something sturdy – “good bones” as they say.
The process to finding a perfect piece of furniture to flip is remarkably similar to finding a good real estate flip believe it or not. Try to look past things that can be changed like color, dirt, and even in some cases outdated styling. Instead focus on the overall silhouette and decide if it will suit your needs once functional and/or decorated.
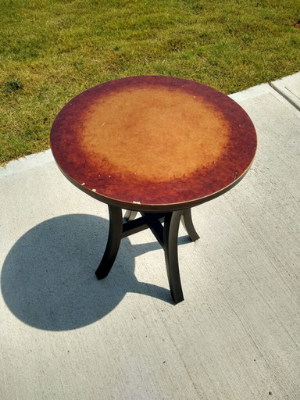
This side table was spotted at my local Habitat for Humanity one fine afternoon and purchased for a mere $20! If you haven’t ever gone to check one out in your area, you should absolutely do it ASAP. They have tons of stuff, all at a steal of course, and they provide some amazing benefits to the local community. An awesome organization all around.
Back to the side table. The top is made of wood and the legs are metal. While the veneer wass chipping on top there were no cracks and all of the screws were in place.
Other Posts Related to DIY Projects:
- DIY Backyard Fence Project
- Paint Flower Pots with Plant Puns DIY Decor
- Build Your Own Honeycomb Shelving
The Process of Flipping Furniture
You might be familiar with parts of the process if you’re a fan of the show Flea Market Flip on HGTV. Since this is such a small project, you’ll see the process is pretty straightforward here.
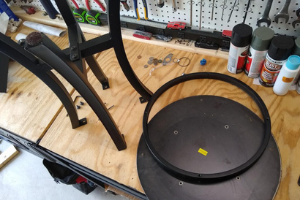
First I took this one apart by unscrewing the metal legs which were in great shape and needed no repair.
Then I gathered up some fine grit sandpaper and started sanding.
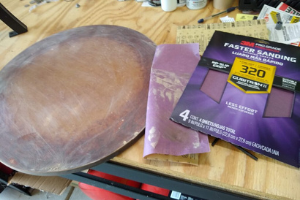
The goal here was to get everything to one smooth level surface as well as scratch it up a bit, since I planned to spray paint and needed to give the paint something to hold onto.
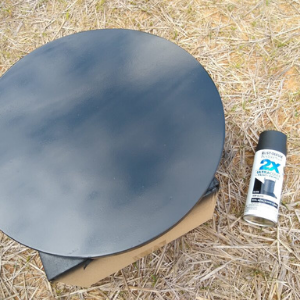
After that it was time to lay on the paint. Now let me remind you that I am nowhere near a professional, having spray painted oh, I dunno, maybe TWO things in my whole up to this point.
But I was willing to give it a go.
And another.
And another.
You see, the beautiful thing about spray painting is if you don’t get it even after one coat you can always sand it down and respray again. Which is also why it’s perfect for beginner thrift store flip projects.
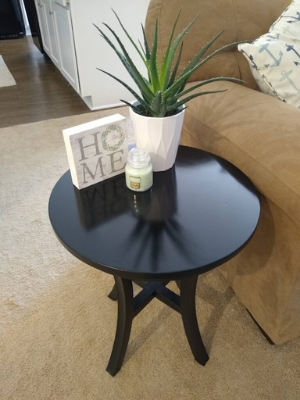
At last, the Final Upgraded Side Table Product
Cost of Materials:
- Spray Paint – $4
- Sand Paper – $5
- Table – $20
Total cost of this Furniture Flip DIY Project: $29
So there you have it! Overall I’m so happy with how this one turned out. It’s exactly what I needed for this space and you can’t beat the savings for this solid table. I hope you enjoyed seeing the transformation and are maybe inspired to go out and find your own! Happy flipping!

Leave a Reply